Tag Archives: crochet

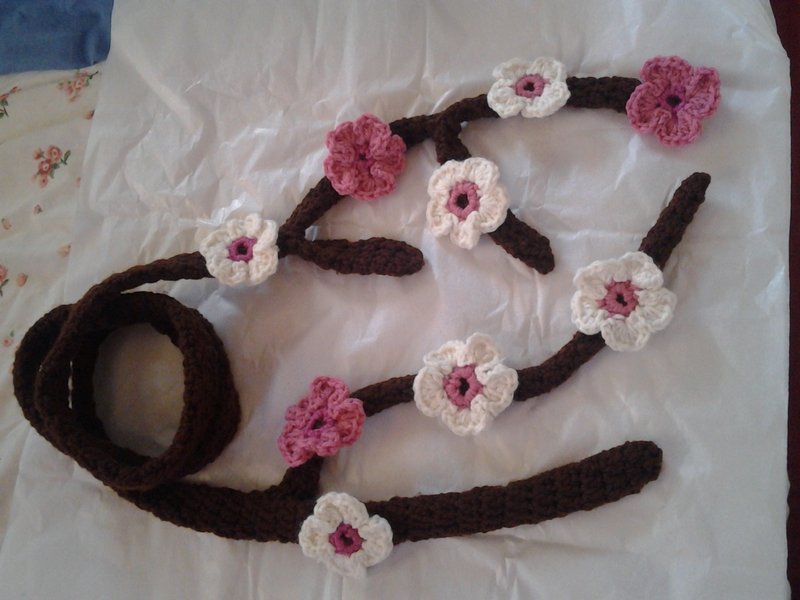
Want to make your own sakura scarf? Here’s how…

You’ll need:
1 skein brown yarn (any material of your choice)
scraps of pink & white yarn
H crochet hook
yarn needle

Gauge does not matter.

With the brown yarn, chain 10. Leave a long enough tail to do decrease stitches later. Then slip stitch in first chain to form foundation of tube, chain 2 and dc each stitch all around.

Continue until tube reaches 48-60 inches. Now decrease double crochet, dc 1. Repeat until 1 stitch remains and bind off.

With the other end of the tube, do decrease double crochet, dc 1 with the tail. Repeat until 1 stitch remains and bind off. You now have a tree branch!

Now make some twigs!
Chain 8, slip stitch in first chain, chain 2 and dc each stitch until desired length is reached anywhere from 4-8 inches. Decrease double crochet, dc 1. Repeat until 1 stitch remains and bind off. Leave the other end alone; you’ll be attaching that end to the main branch.

Make 2 more twigs, any length is up to you.

Sew on the twigs onto the main tube so it resembles a cherry tree branch.

The branch need flowers. Go to this site and follow the pattern instructions: http://nekosknitting.blogspot.com/2011/03/sakura.html
(Someone else came up with this flower pattern, not me.)
Make as many flowers as you like.

Sew the flowers on to the branch. Weave in ends.

Le Petit Prince

A baby hat inspired by the Little Prince book.

1) Cast on 2 stitches
2) Knit 1 row
3) Increase 1 stitch at each end. You should have 4 stitches on the needle.
4) Purl 1 row
5) Knit 1 row
6) Purl 1 row

7) Increase 1 stitch, knit all stitches in between, increase 1 stitch on last one.
8) Purl 1 row
9) Knit 1 row
10) Purl 1 row

11) Repeat Steps 7 and 10 until 48 stitches are on the needle. The piece should measure 11” long and 12” wide at top. You should end up with a nice triangle.

12) Knit & purl in alternate rows for another 15-20 rows (or more if you want a longer length)

13) Knit 1, purl 1 for the next 15-20 rows.

14) Bind off loosely.

15) Sew the long edges together to form hat. Leave the ends on for sewing on the star later.

16) Crochet the star:
a- Make a magic crochet ring.

b- 10 sc in the ring

c- 2 sc in each stitch

d- *sc 3 stitches, 2 sc in next stitch* repeat to end of circle. You should end with 25 stitches in the round.

e- sc 5 ST, ch 1, turn

f- sc all ST, ch 1, turn

g- sc2tog, sc 1, sc2tog, ch 1, turn

h- sc all ST, ch 1, turn

i- sc2tog, sc 1, ch 1, turn

j- sc 2 ST, ch 1, turn

k- sc2tog

l- slip stitch down one side of the star arm

m- repeat steps e through l to make the other four arms

17) Make another star. (My first star tend to curl up, so I made another one to stablize the arms.)

18) Sew the stars together to make a stable unit and attach to the pointy part of hat. Weave in ends.  Done.